> ## Documentation Index
> Fetch the complete documentation index at: https://academy.uagenius.ai/llms.txt
> Use this file to discover all available pages before exploring further.
# Recreate a Body
> Swap the assets in a delivered gameplay template for your own, then build the video.
Once the UAG team delivers a template, that gameplay is yours to work with. **Recreate with AI** on the template opens the **Recreate Body** studio, where you swap the individual assets in the gameplay for your own and build a new video from them.
If you have not requested a template yet, start at [Request a body template](/request-body-template).
Recreating a body works differently from [recreating a hook](/recreate-hook). A hook is generated as one video. A body is built asset by asset, so you decide exactly what changes and what stays.
## Original versus template
**View templates** on a body card opens a modal listing:
The competitor's own footage, exactly as it ran. Useful as reference for choosing a structure.
That same gameplay structure turned into a template, ready for you to recreate and compose with.
The modal header reads `Original + N templates`, where N is how many templates exist for that body in the current game.
**Recreate with AI** appears on the templates, not on the original. If a body offers no Recreate action, its template is still to be delivered.
## The studio
The **Recreate Body** screen puts your template and its assets on the left, and your finished video generations on the right.
### Switch between templates
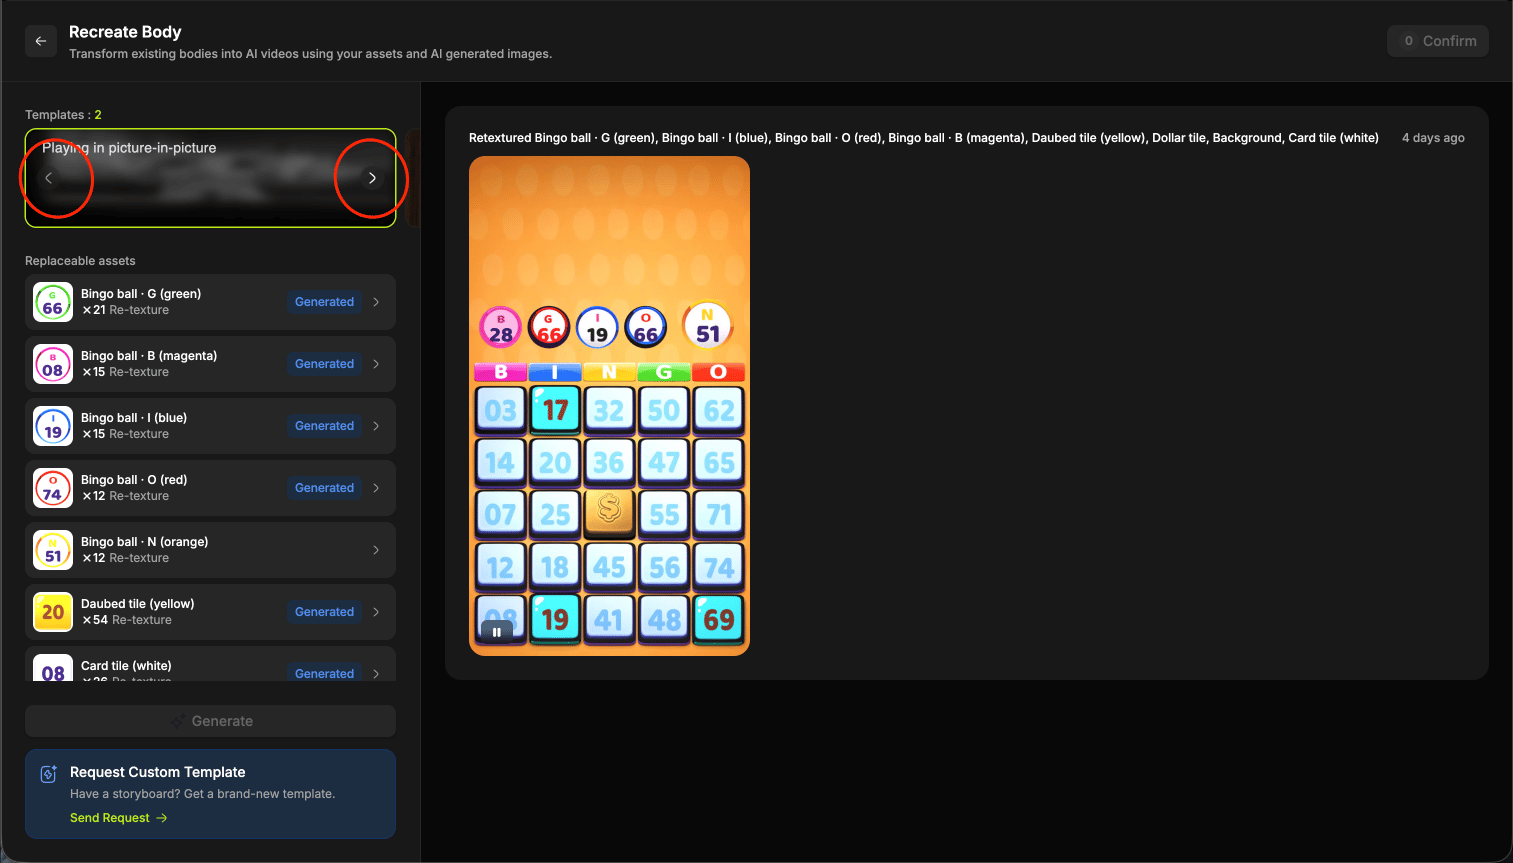 **Templates** at the top of the left panel shows how many you have to work with. Use the arrows to move between them, and selecting one plays the original in a picture-in-picture player so you can watch what you are rebuilding.
Each template brings its own set of replaceable assets, so switching template changes the list below it.
### Replaceable assets
Under the template thumbnail, **Replaceable assets** lists every element of the gameplay you can swap. Each row shows the asset, how many times it appears in the video, and what will happen to it.
**Templates** at the top of the left panel shows how many you have to work with. Use the arrows to move between them, and selecting one plays the original in a picture-in-picture player so you can watch what you are rebuilding.
Each template brings its own set of replaceable assets, so switching template changes the list below it.
### Replaceable assets
Under the template thumbnail, **Replaceable assets** lists every element of the gameplay you can swap. Each row shows the asset, how many times it appears in the video, and what will happen to it.
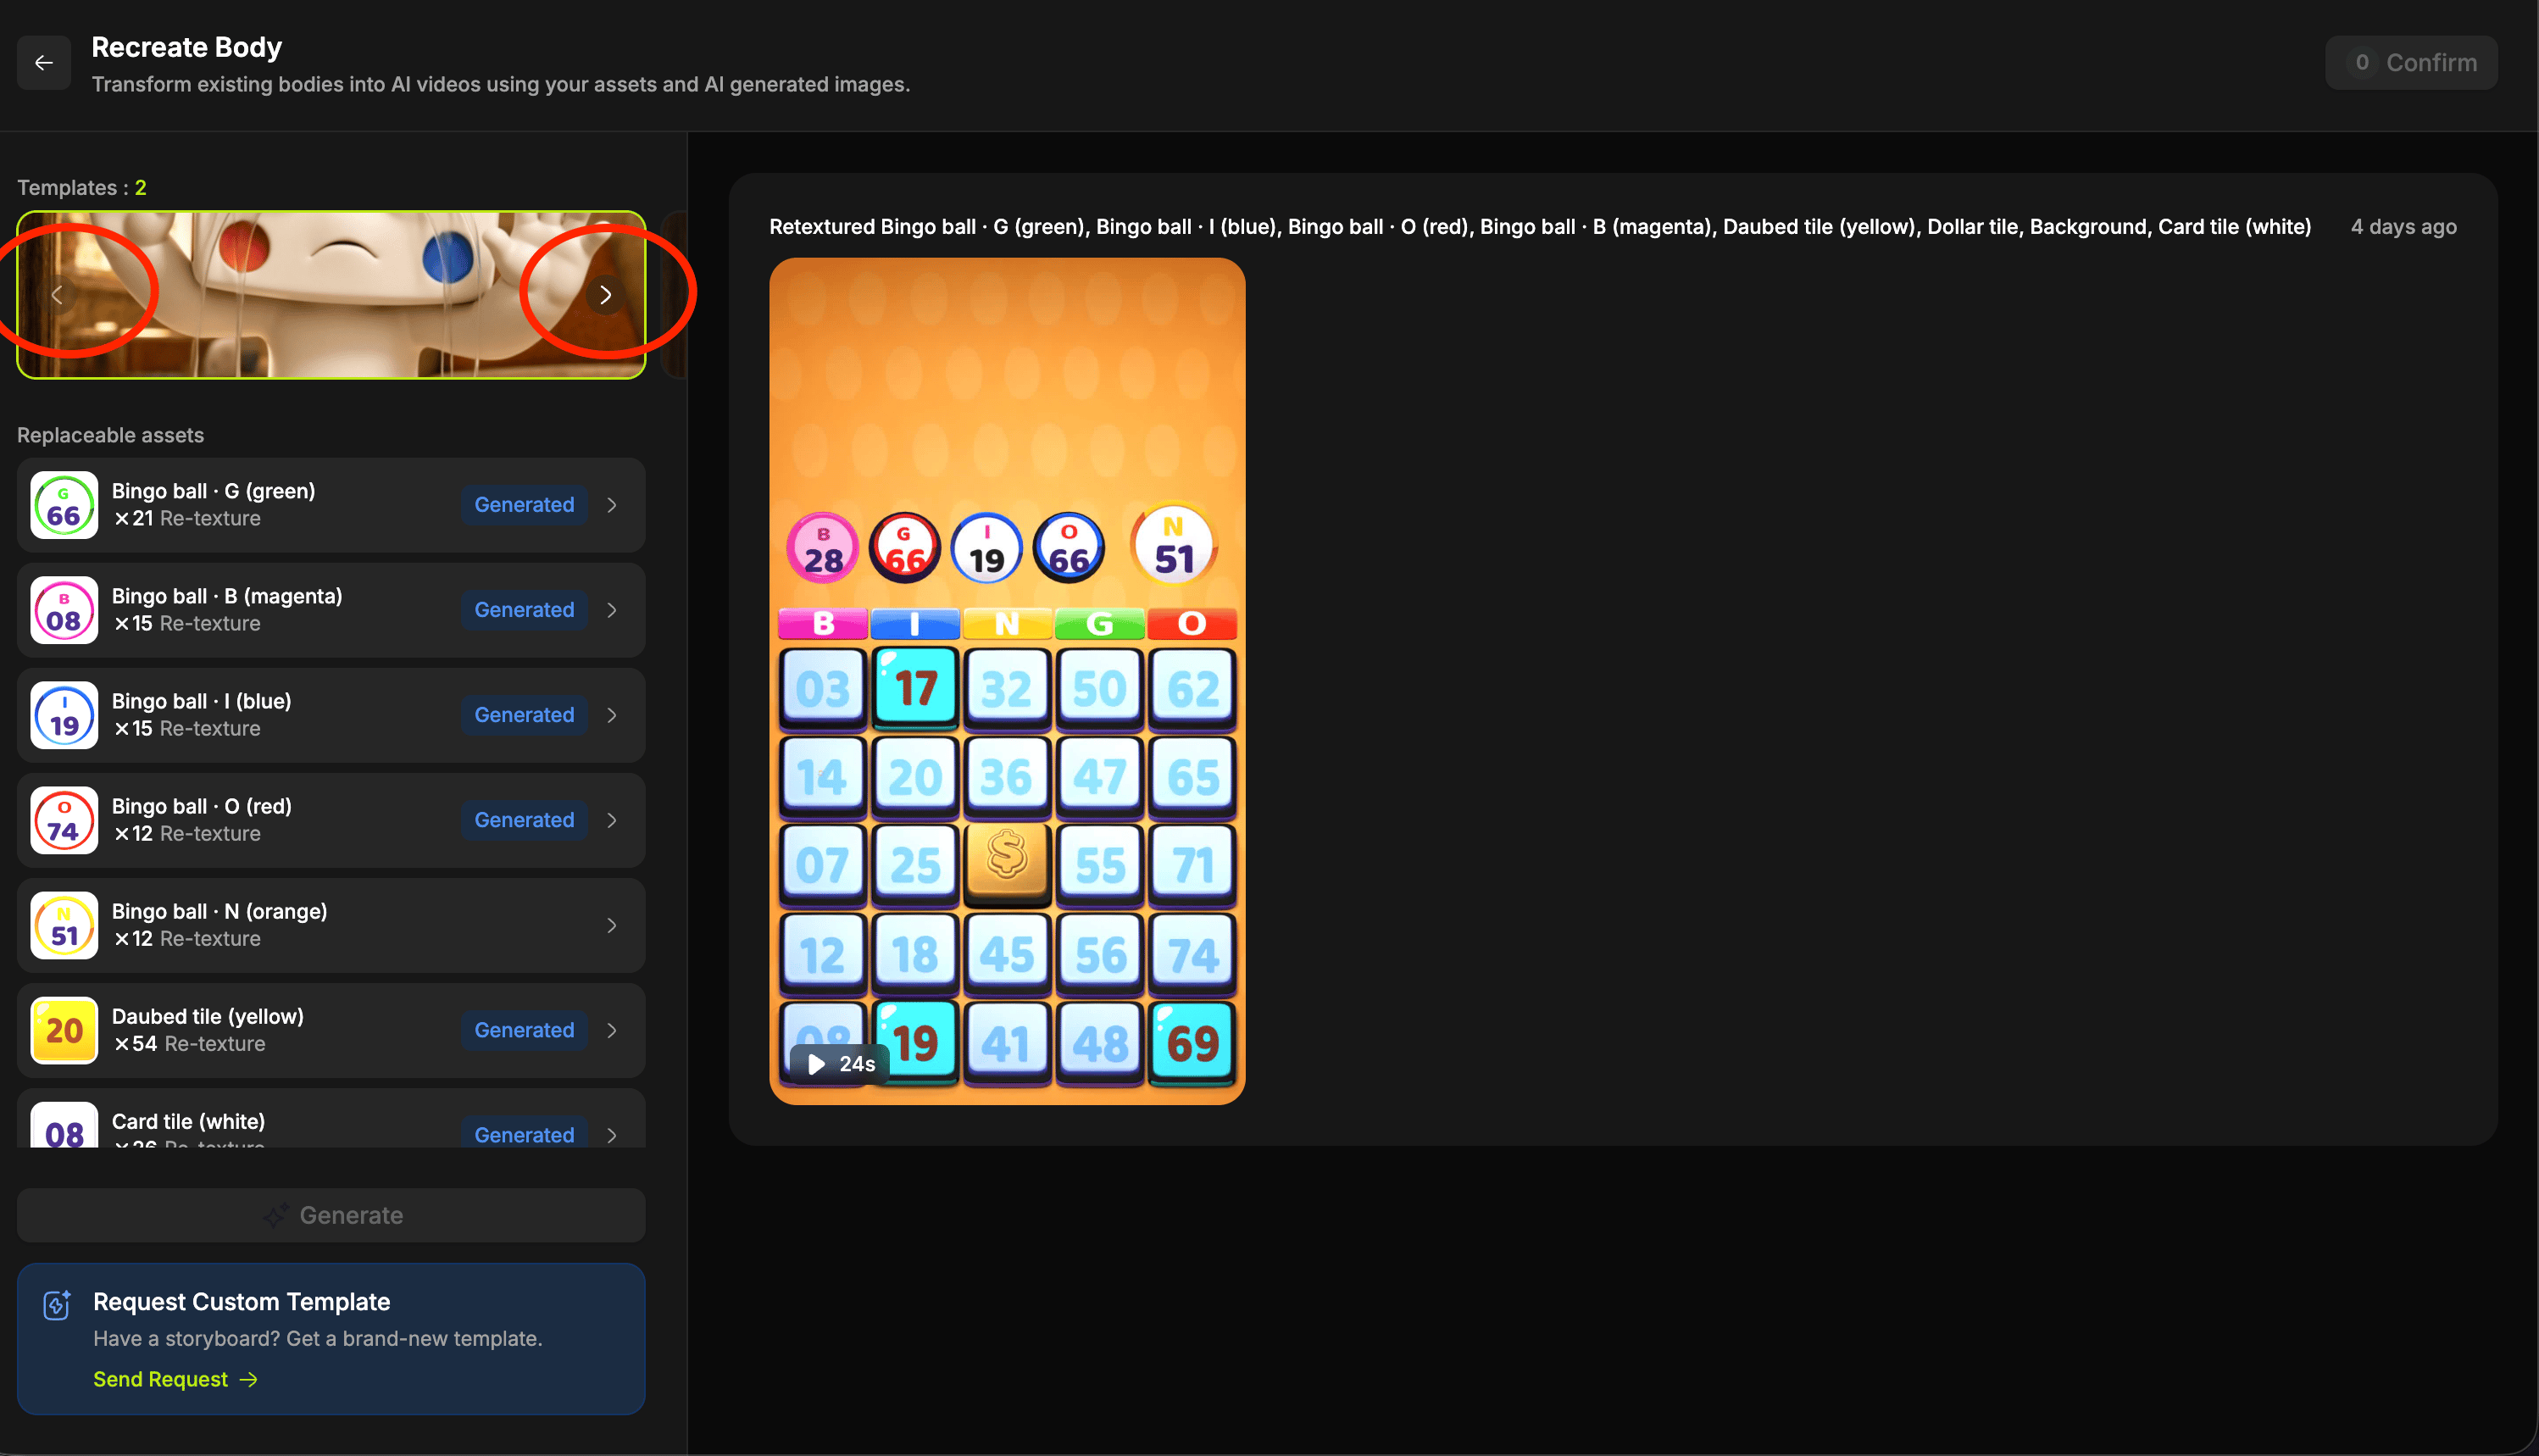 | On the row | What it tells you |
| ------------- | ----------------------------------------------------------------------------------------------- |
| **Name** | The asset, for example `White tile`, `Player photo · 1` or `Beach House`. |
| **Count** | How many instances appear, for example `×40`, `×8` or `×1`. |
| **Operation** | Which of the three applies to it: **Replace**, **Re-texture** or **Re-color**. |
| **State** | Whether a version has been generated, and once you set one, a thumbnail of the asset you chose. |
### The three operations
Every replaceable asset is set up for one of three operations, shown on its row next to the count. What you give it depends on which one it is.
| Operation | What it changes | What you give it |
| -------------- | -------------------------------------------- | ----------------------------------------------------------------- |
| **Re-texture** | The surface of the asset, keeping its shape. | An image, a prompt, or both. |
| **Replace** | Swaps the object itself for a new one. | A prompt, then a confirmation so the image can become a 3D model. |
| **Re-color** | The colour, and nothing else. | A hex code. |
Selecting an asset opens its own history on the right, where you work in whichever of the three it uses. **Back to videos** returns you to the video list.
Give it a prompt, an image, or both. A prompt on its own is enough, so you can simply describe what you want.
Each generation lays out three panels:
| Panel | What it shows |
| ------------------- | -------------------------------------------- |
| **2D Model** | The generated asset on its own. |
| **Original frame** | A frame from the video as it stands. |
| **Recreated frame** | The same frame with your new asset in place. |
Replace runs in two steps, and the header tracks which one you are on.
Describe the object you want and generate an image of it. **Edit image** lets you adjust the prompt until it looks right.
Select **Generate 3D Model** to turn that image into a model. The studio spells out the handover: *Confirm the generated image to continue with 3D model generation.*
The finished generation shows the **3D Model** alongside the **Original frame** and the **Recreated frame** with your object swapped in.
A single step, and the only input is a colour. Enter a hex code, for example `#000000`, then select **Re-color**.
The result shows the **Original frame** beside the **Recreated frame** in the new colour.
The **Recreated frame** is the panel to trust. An asset can look right on its own and still sit oddly in the frame.
### Set an asset as final
| On the row | What it tells you |
| ------------- | ----------------------------------------------------------------------------------------------- |
| **Name** | The asset, for example `White tile`, `Player photo · 1` or `Beach House`. |
| **Count** | How many instances appear, for example `×40`, `×8` or `×1`. |
| **Operation** | Which of the three applies to it: **Replace**, **Re-texture** or **Re-color**. |
| **State** | Whether a version has been generated, and once you set one, a thumbnail of the asset you chose. |
### The three operations
Every replaceable asset is set up for one of three operations, shown on its row next to the count. What you give it depends on which one it is.
| Operation | What it changes | What you give it |
| -------------- | -------------------------------------------- | ----------------------------------------------------------------- |
| **Re-texture** | The surface of the asset, keeping its shape. | An image, a prompt, or both. |
| **Replace** | Swaps the object itself for a new one. | A prompt, then a confirmation so the image can become a 3D model. |
| **Re-color** | The colour, and nothing else. | A hex code. |
Selecting an asset opens its own history on the right, where you work in whichever of the three it uses. **Back to videos** returns you to the video list.
Give it a prompt, an image, or both. A prompt on its own is enough, so you can simply describe what you want.
Each generation lays out three panels:
| Panel | What it shows |
| ------------------- | -------------------------------------------- |
| **2D Model** | The generated asset on its own. |
| **Original frame** | A frame from the video as it stands. |
| **Recreated frame** | The same frame with your new asset in place. |
Replace runs in two steps, and the header tracks which one you are on.
Describe the object you want and generate an image of it. **Edit image** lets you adjust the prompt until it looks right.
Select **Generate 3D Model** to turn that image into a model. The studio spells out the handover: *Confirm the generated image to continue with 3D model generation.*
The finished generation shows the **3D Model** alongside the **Original frame** and the **Recreated frame** with your object swapped in.
A single step, and the only input is a colour. Enter a hex code, for example `#000000`, then select **Re-color**.
The result shows the **Original frame** beside the **Recreated frame** in the new colour.
The **Recreated frame** is the panel to trust. An asset can look right on its own and still sit oddly in the frame.
### Set an asset as final
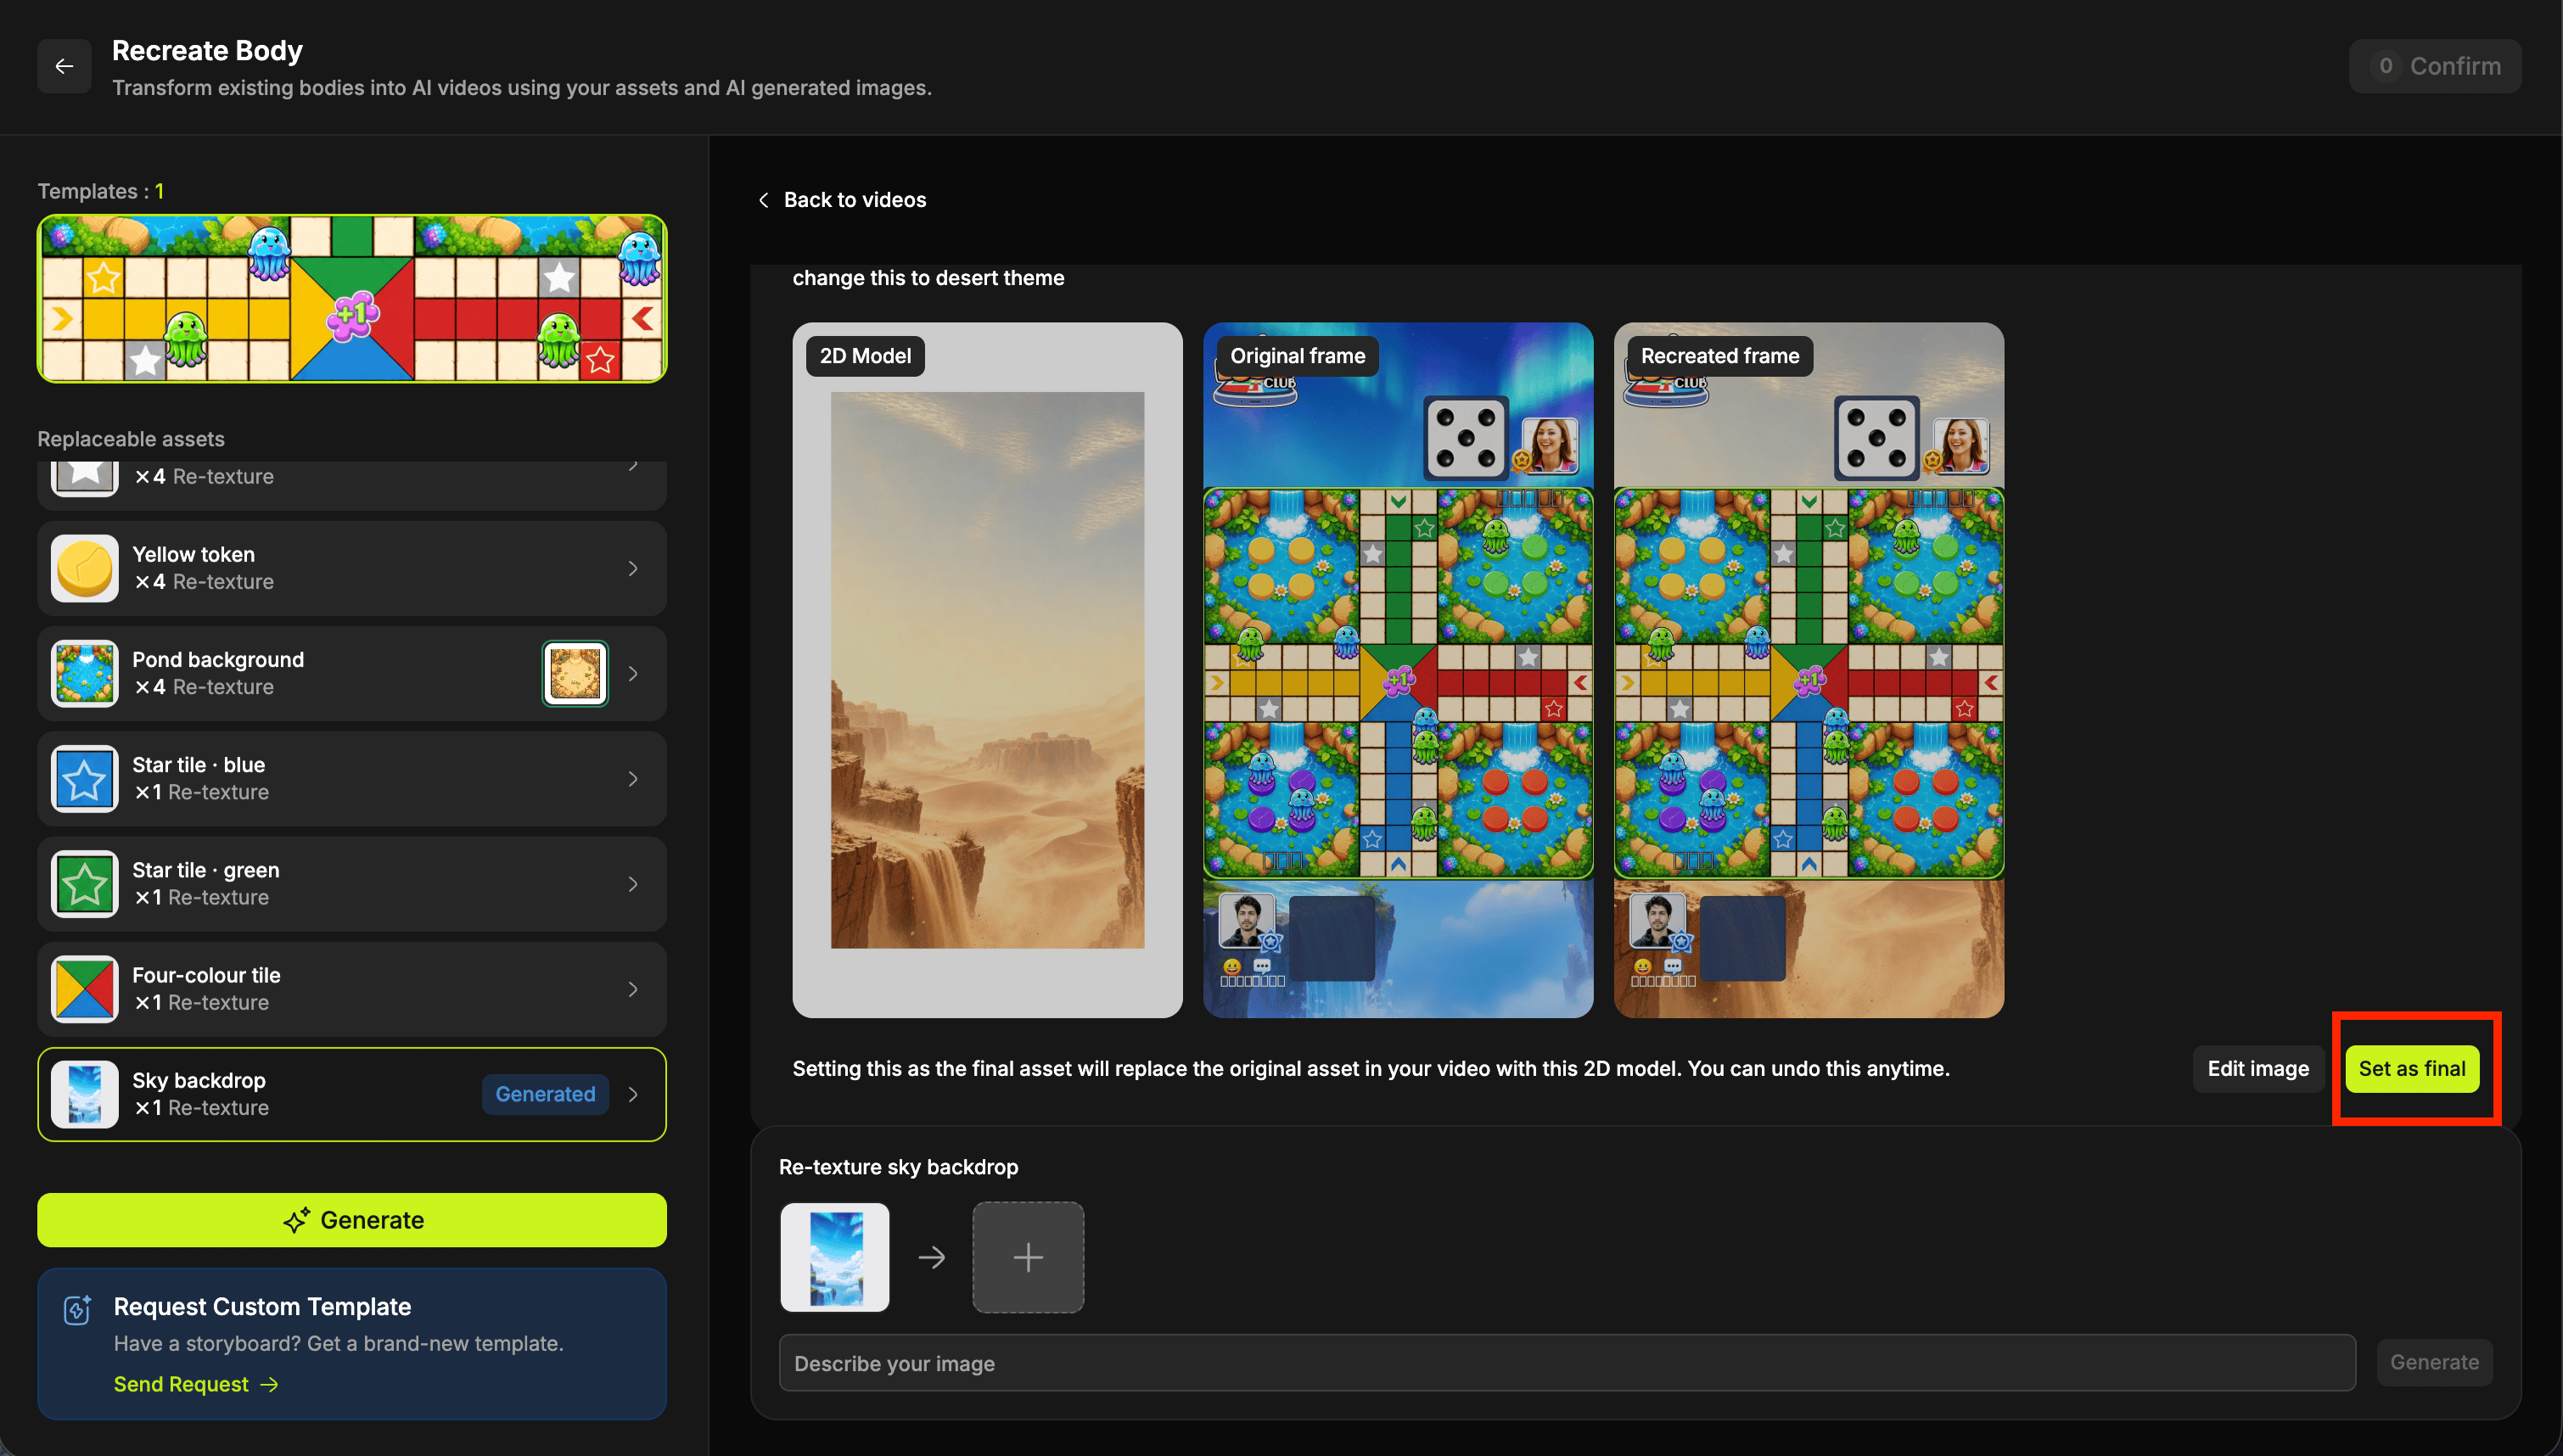 When a version works, select **Select as final asset**. The studio confirms what that means:
> Setting this as the final asset will replace the original asset in your video with this 2D model. You can undo this anytime.
Two controls sit alongside it:
* **Edit image** opens an inline prompt so you can adjust the same asset without starting over.
* **Remove final asset** clears your choice and puts the original back.
Once an asset is final, its row on the left shows the new thumbnail in place of its state, so you can see at a glance what your video will use.
Generate as many versions of an asset as you like, and run several assets at once. You set one final per asset, so exploring options costs you nothing but time.
## Generate the video
With your finals set, select **Generate** on the left. The video is built using every asset you set as final, and everything you left alone stays as it was.
You can run several video generations in parallel, so there is no need to wait on one before trying a different combination of assets.
A typical 45 second video takes around 20 minutes to generate. That varies with how many assets you have changed and a few other factors, so start it and carry on with something else.
## Download, rate and set your final video
Finished videos appear on the right of the studio with the same controls as a recreated hook:
| Control | What it does |
| ------------ | ---------------------------------------------------------------------- |
| **Download** | Saves the video straight to your device. |
| **Like** | Marks the result as a good one. |
| **Dislike** | Opens **Share feedback**, where you describe what was off and send it. |
When a result is not what you expected, select **Dislike** and say what went wrong. The system runs an auto improvement cycle on that feedback, so the next time you recreate something similar the quality comes back better, for you and for your team.
To keep a video, set it as your final video and **Confirm**. It then behaves exactly like a recreated hook: it comes back to [Competitor research](/competitor-research), and the body's card carries a **Recreations** tag.
Selecting the tag fans the card out to show every final recreation of that gameplay, so you can compare your versions and pick the one to ship.
## Request a custom template
If the delivered templates do not cover what you have in mind, **Request Custom Template** sits at the bottom of the left panel.
Select **Send Request** and the UAG team builds a new template from your storyboard. See [Request a body template](/request-body-template) for how requests work.
## Take them into Video Studio
Your recreated bodies are ready to build around. Select the ones you want in [Competitor research](/competitor-research) and choose **Generate Ads** to land in [Video Studio](/video-studio) with them already in the **Body** column.
The body sets the output aspect ratio for the whole batch, so pick the recreation in the ratio you intend to ship before you start pairing it with hooks and texts.
When a version works, select **Select as final asset**. The studio confirms what that means:
> Setting this as the final asset will replace the original asset in your video with this 2D model. You can undo this anytime.
Two controls sit alongside it:
* **Edit image** opens an inline prompt so you can adjust the same asset without starting over.
* **Remove final asset** clears your choice and puts the original back.
Once an asset is final, its row on the left shows the new thumbnail in place of its state, so you can see at a glance what your video will use.
Generate as many versions of an asset as you like, and run several assets at once. You set one final per asset, so exploring options costs you nothing but time.
## Generate the video
With your finals set, select **Generate** on the left. The video is built using every asset you set as final, and everything you left alone stays as it was.
You can run several video generations in parallel, so there is no need to wait on one before trying a different combination of assets.
A typical 45 second video takes around 20 minutes to generate. That varies with how many assets you have changed and a few other factors, so start it and carry on with something else.
## Download, rate and set your final video
Finished videos appear on the right of the studio with the same controls as a recreated hook:
| Control | What it does |
| ------------ | ---------------------------------------------------------------------- |
| **Download** | Saves the video straight to your device. |
| **Like** | Marks the result as a good one. |
| **Dislike** | Opens **Share feedback**, where you describe what was off and send it. |
When a result is not what you expected, select **Dislike** and say what went wrong. The system runs an auto improvement cycle on that feedback, so the next time you recreate something similar the quality comes back better, for you and for your team.
To keep a video, set it as your final video and **Confirm**. It then behaves exactly like a recreated hook: it comes back to [Competitor research](/competitor-research), and the body's card carries a **Recreations** tag.
Selecting the tag fans the card out to show every final recreation of that gameplay, so you can compare your versions and pick the one to ship.
## Request a custom template
If the delivered templates do not cover what you have in mind, **Request Custom Template** sits at the bottom of the left panel.
Select **Send Request** and the UAG team builds a new template from your storyboard. See [Request a body template](/request-body-template) for how requests work.
## Take them into Video Studio
Your recreated bodies are ready to build around. Select the ones you want in [Competitor research](/competitor-research) and choose **Generate Ads** to land in [Video Studio](/video-studio) with them already in the **Body** column.
The body sets the output aspect ratio for the whole batch, so pick the recreation in the ratio you intend to ship before you start pairing it with hooks and texts.