
The composer
The composer is a row of columns, each holding one element of the ad: Hook · Hook text | Transitions | Body* · Body text | End Card | Audio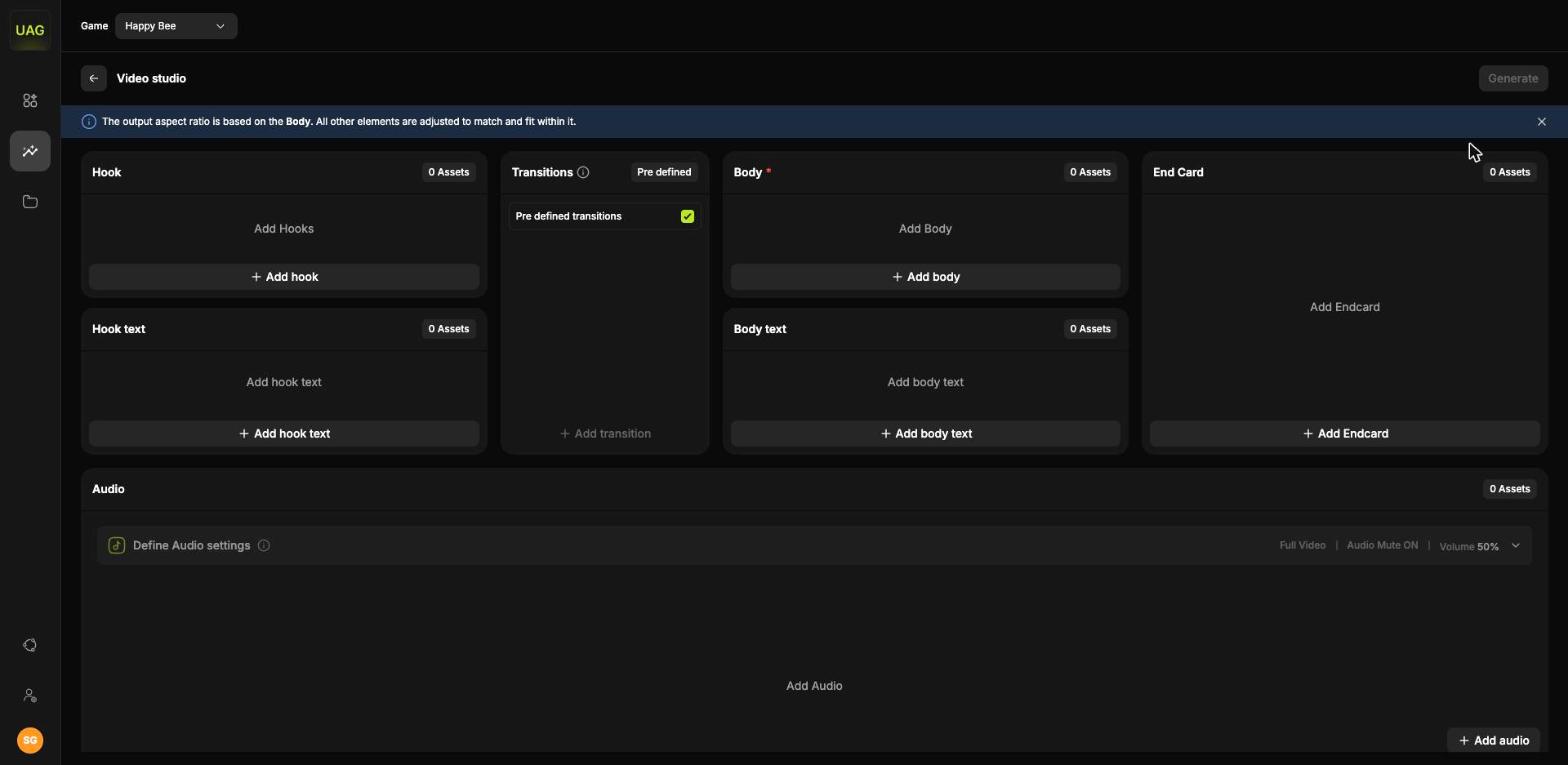
It multiplies
This is the central mechanic. The header recalculates as you select, showing the arithmetic live:Body
The body is the one mandatory element, and it does more than fill the middle of the ad:The output aspect ratio is based on the body. All other elements are adjusted to match and fit within it.
Text rows
You can put text on the hook and on the body separately, and each has its own Add text. Both draw on the same text library, so a line you find can go in either place. Each text row, hook text and body text, offers three controls.AI variation
AI variation
Set a variation count and select Generate. The studio writes that many alternative lines and lists them under the original, so you can branch from a line you like without writing each one yourself.You stay in control of what gets used. Each variant carries a tick to approve and a cross to discard, and only approved ones join the batch. Discarded ones are gone.Approved variants inherit the parent’s font, size, colour, alignment and placement, so styling your base text first means they arrive already formatted. You cannot edit a variant before approving it, but once approved it becomes a regular text asset you can open in the editor like any other.If the first round does not land, select AI variation again for a fresh set. There is no limit on how many times you can iterate from the same base text.Each approved line multiplies the batch, so three AI variations of a hook text triples your video count.
Position
Position
Top, Bottom or Custom. Custom opens the full position editor described below.Top and bottom are reliable defaults, since they stay clear of platform UI in most placements.
Edit text
Edit text
Opens the Edit Text, Position & Style editor.
The text editor
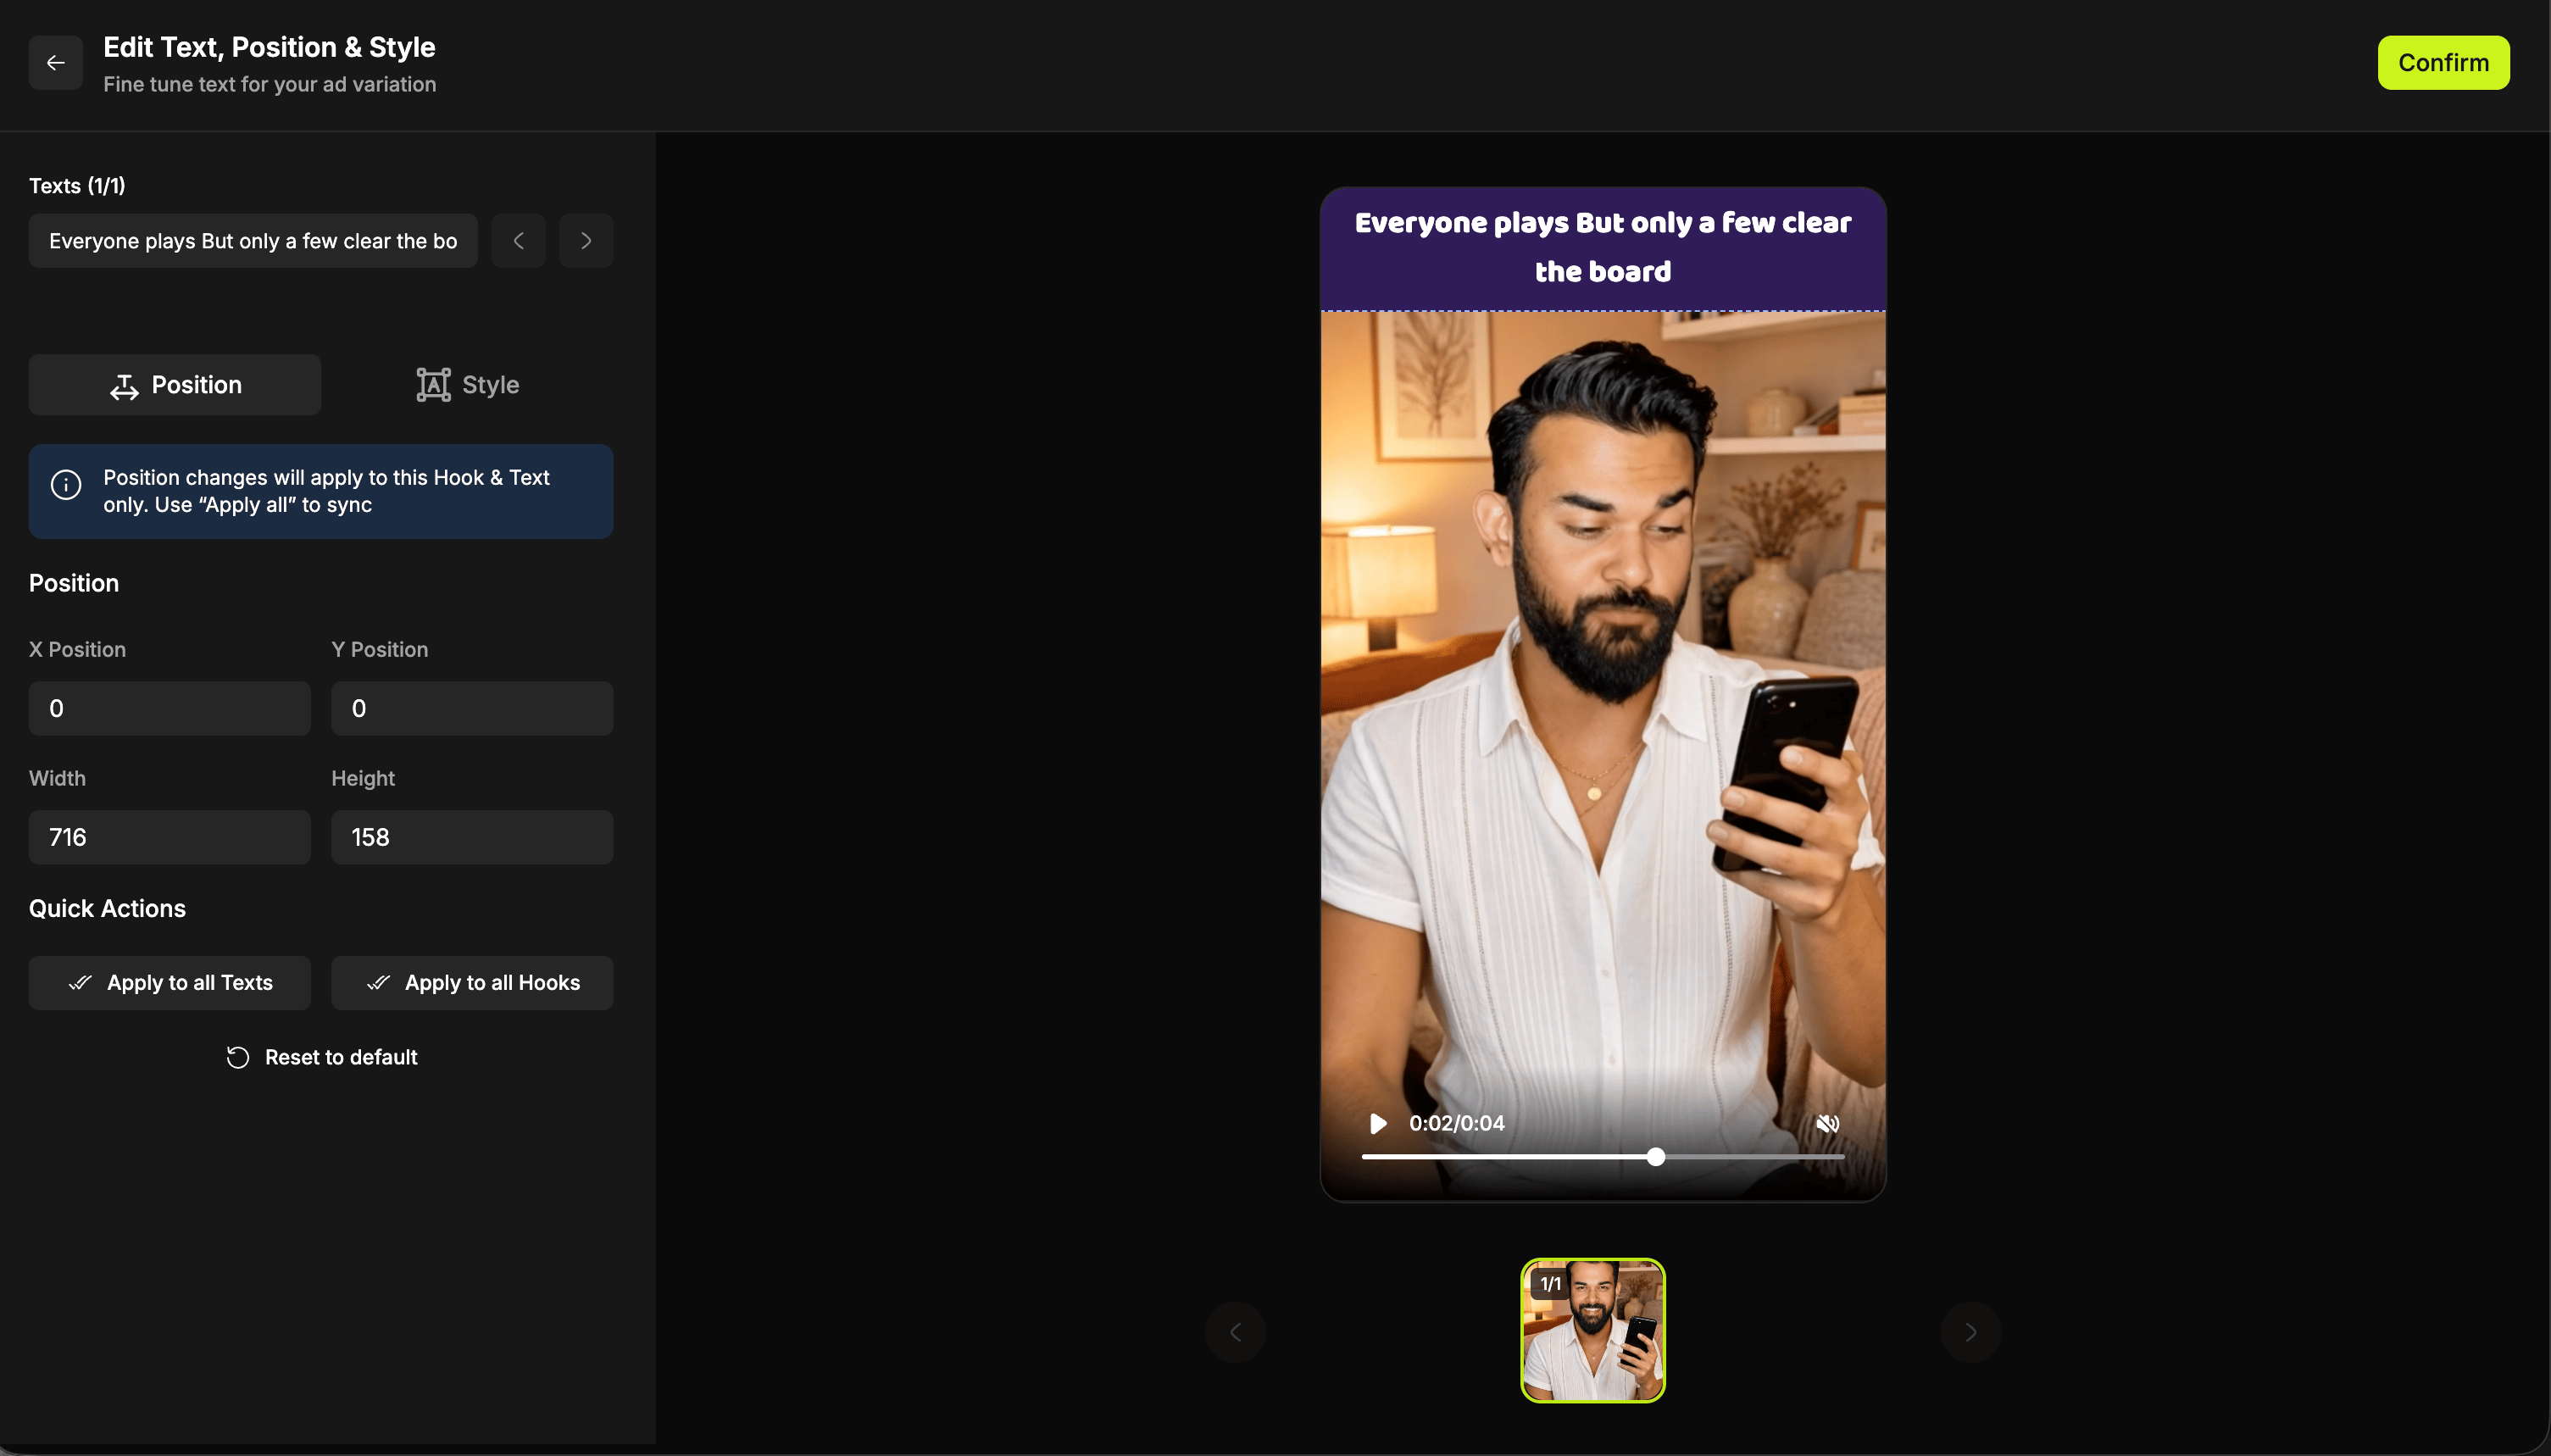
Edit Text, Position & Style has two tabs and a live preview.- Position
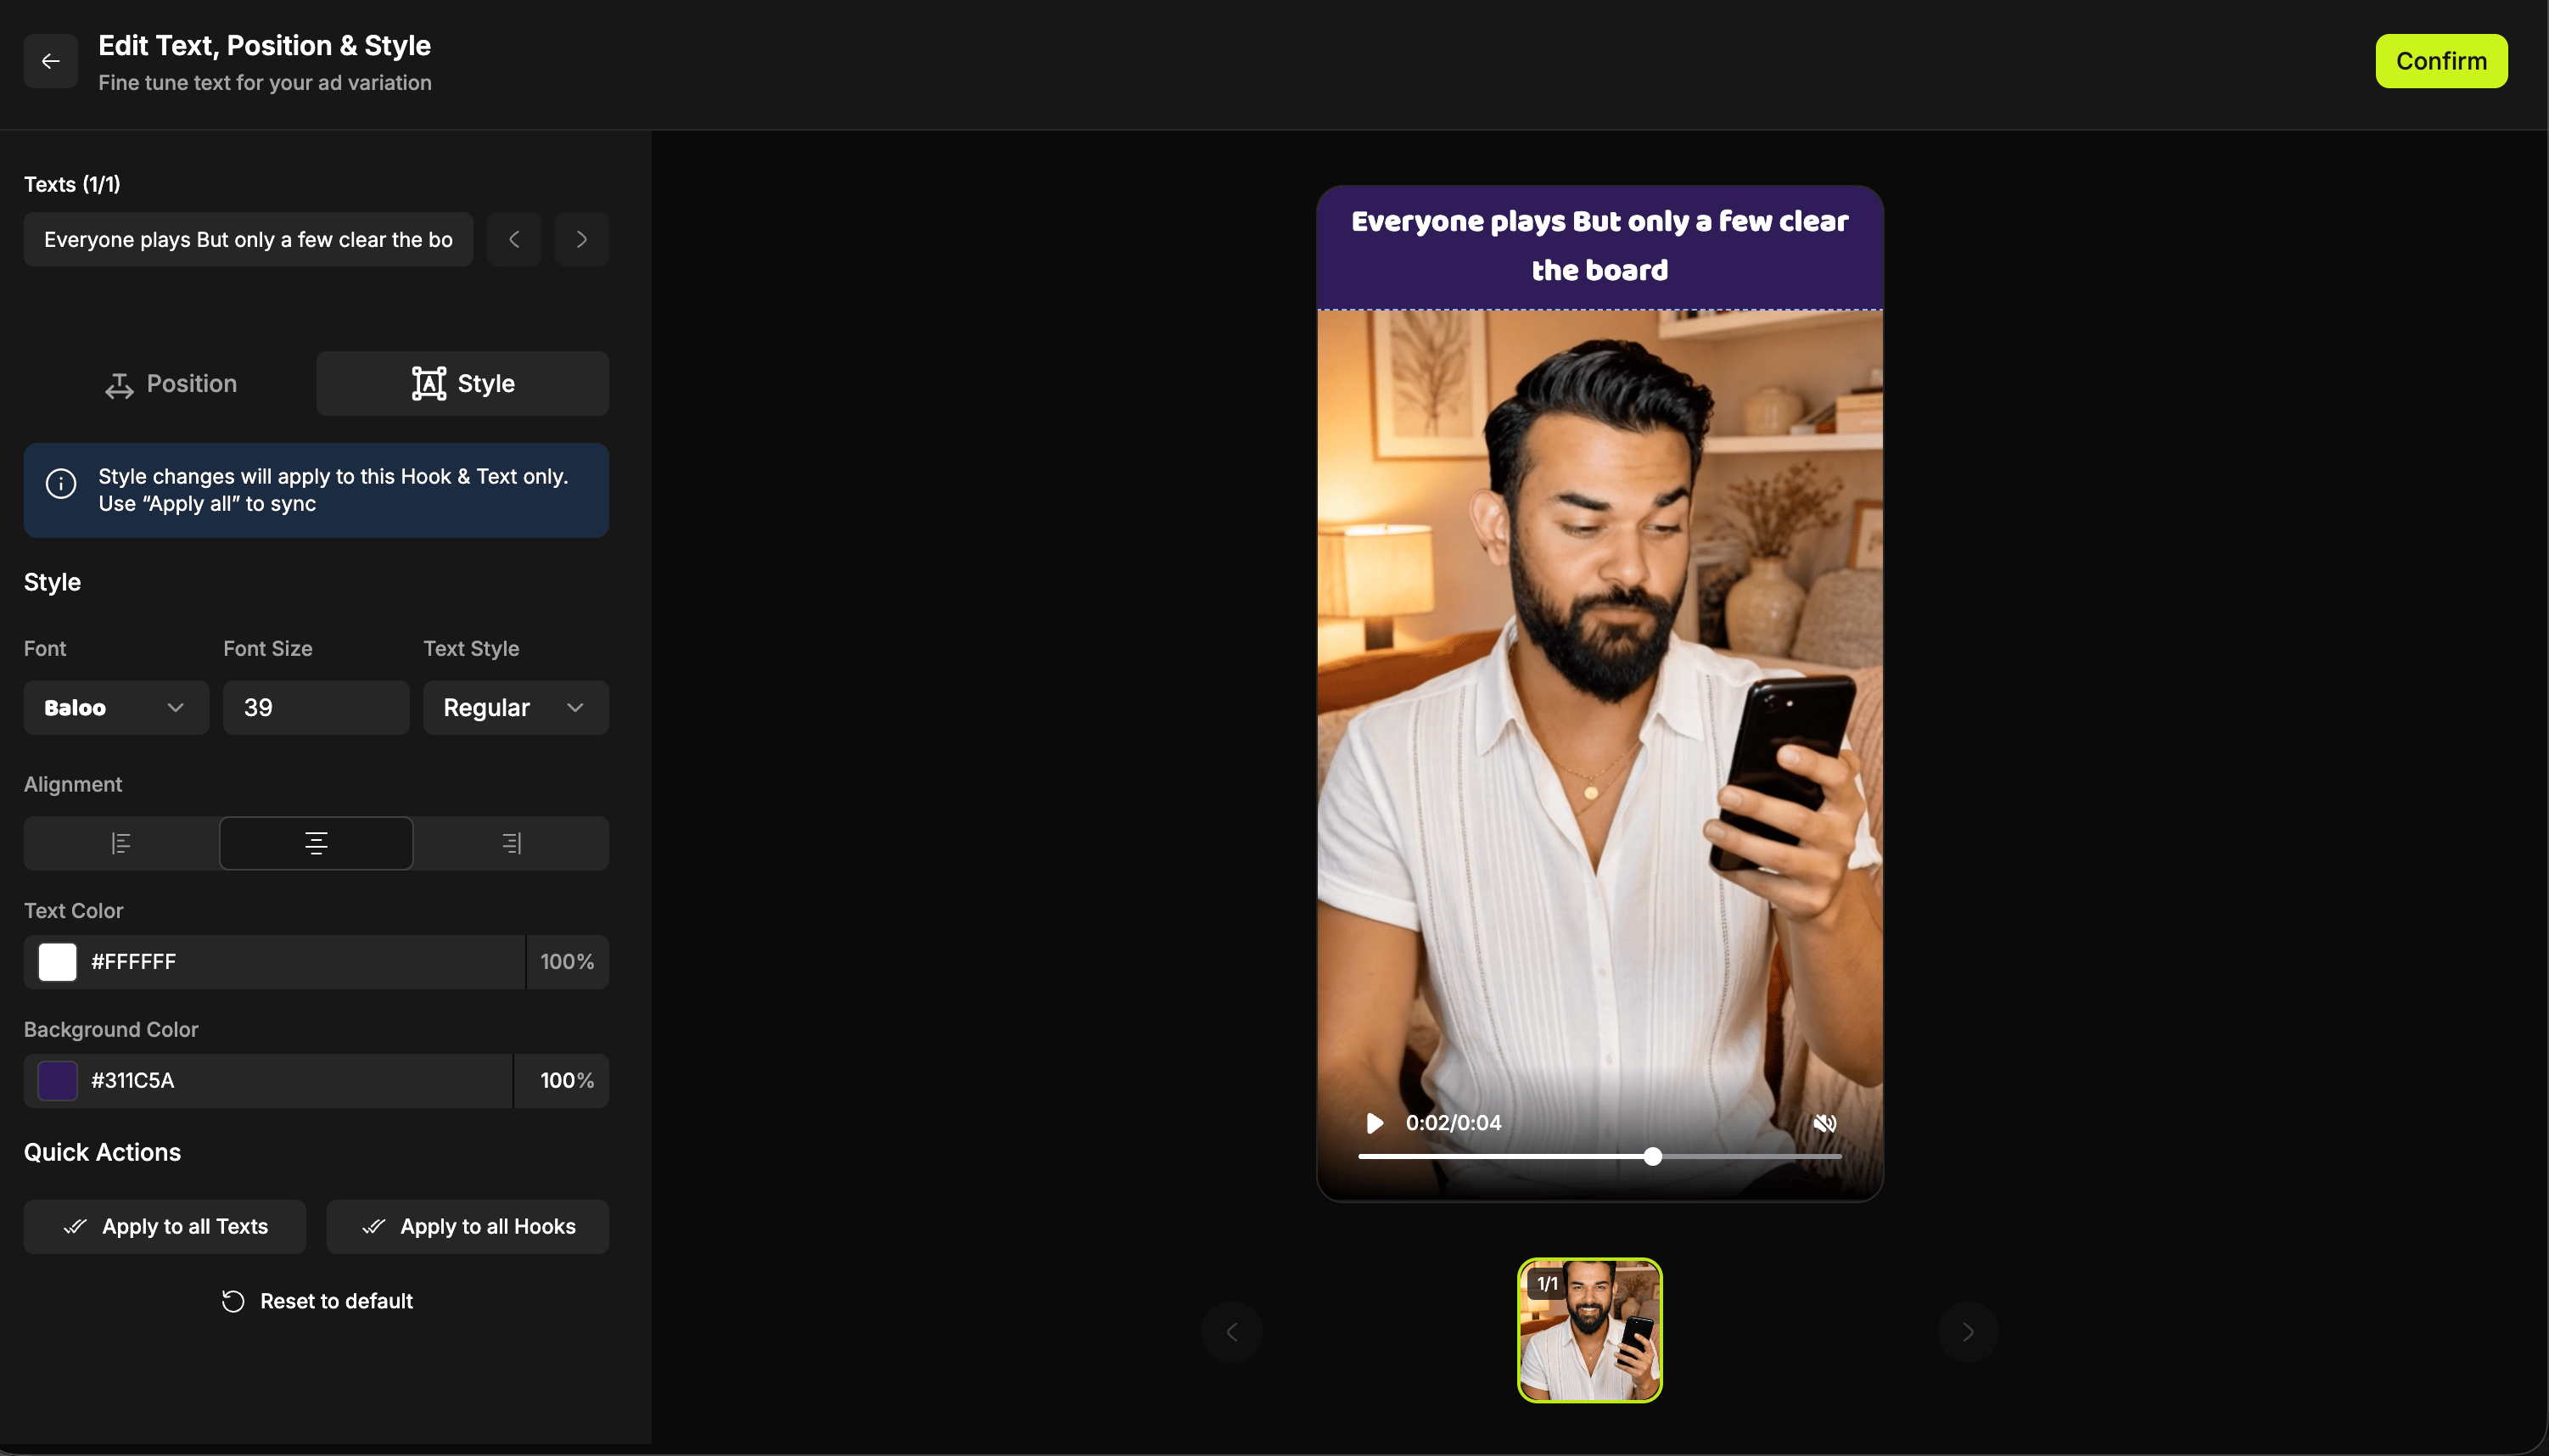
- Style
Quick actions
By default, a style or position change applies only to that one combination of body and text. Three buttons are how you spread it wider:If a text asset has mixed styling, with different fonts, sizes or colours on different words, Apply to all carries everything across except those font properties. Position and background still apply, so it is worth restyling the odd one by hand.
Style parts of a line differently
Transitions
Transitions are set to Pre defined by default. UAGenius maps a transition to each hook based on how it has been used historically, so a sensible choice is already in place before you touch anything. Clearing the Pre defined transitions tick is what enables Add transition, so you opt out of the automatic mapping before choosing your own. That opens the eleven options: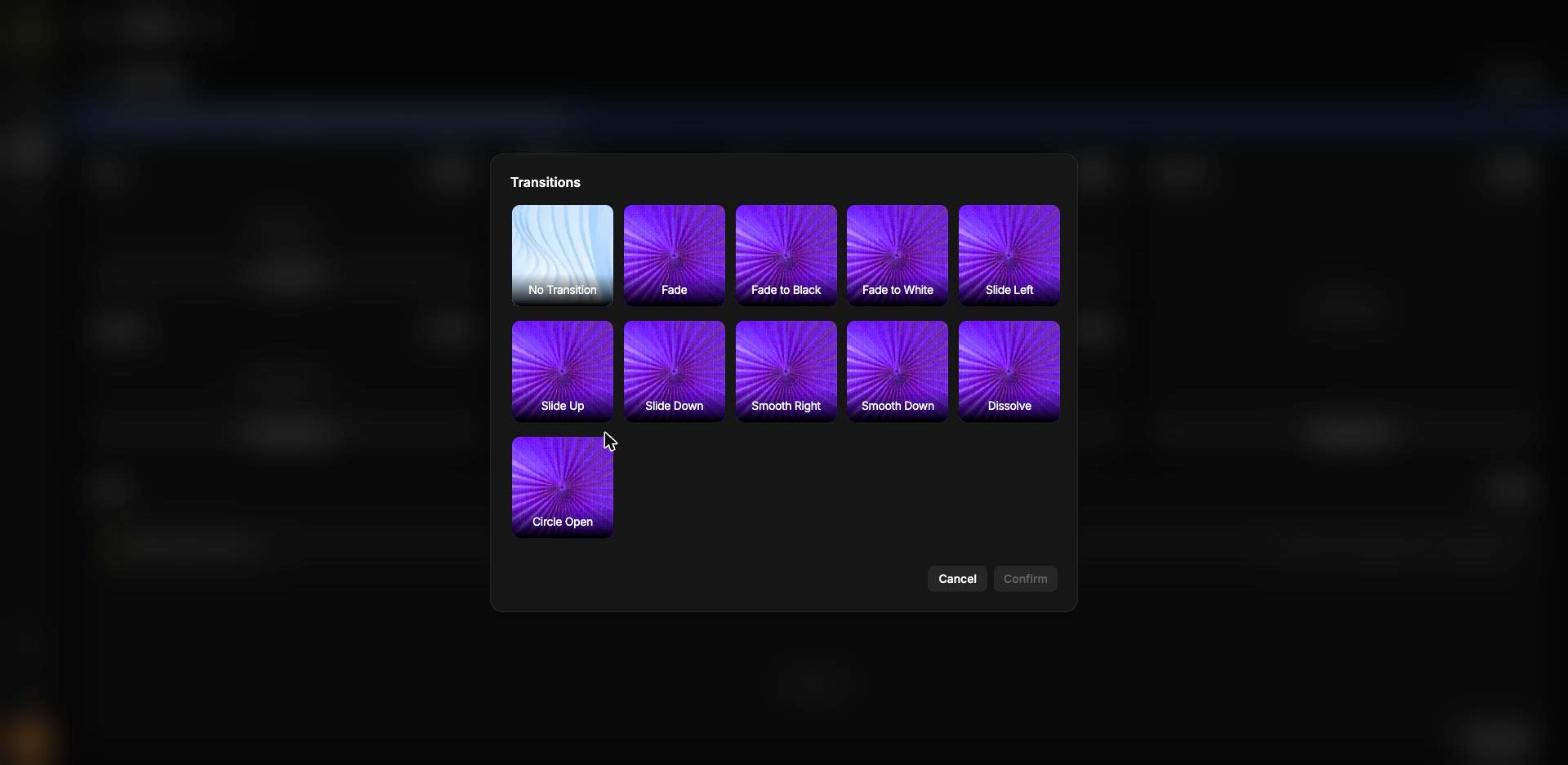
Transitions apply at the hook to body join. The cut between body and end card is not affected.
Adding custom text
Add Text creates copy that is not derived from an existing asset. The modal offers:- Font: Inter, Lato, Montserrat, Metra Serif, Mytupi, Roboto, Rodona and more
- Text style and Alignment
- Text and Background colours, each with opacity
- Save asset for reuse, which stores the text as an asset on one of your boards
Audio settings
Hover any track to preview it before you select it. Once chosen, audio is configured per project and every variation in the batch inherits the same settings: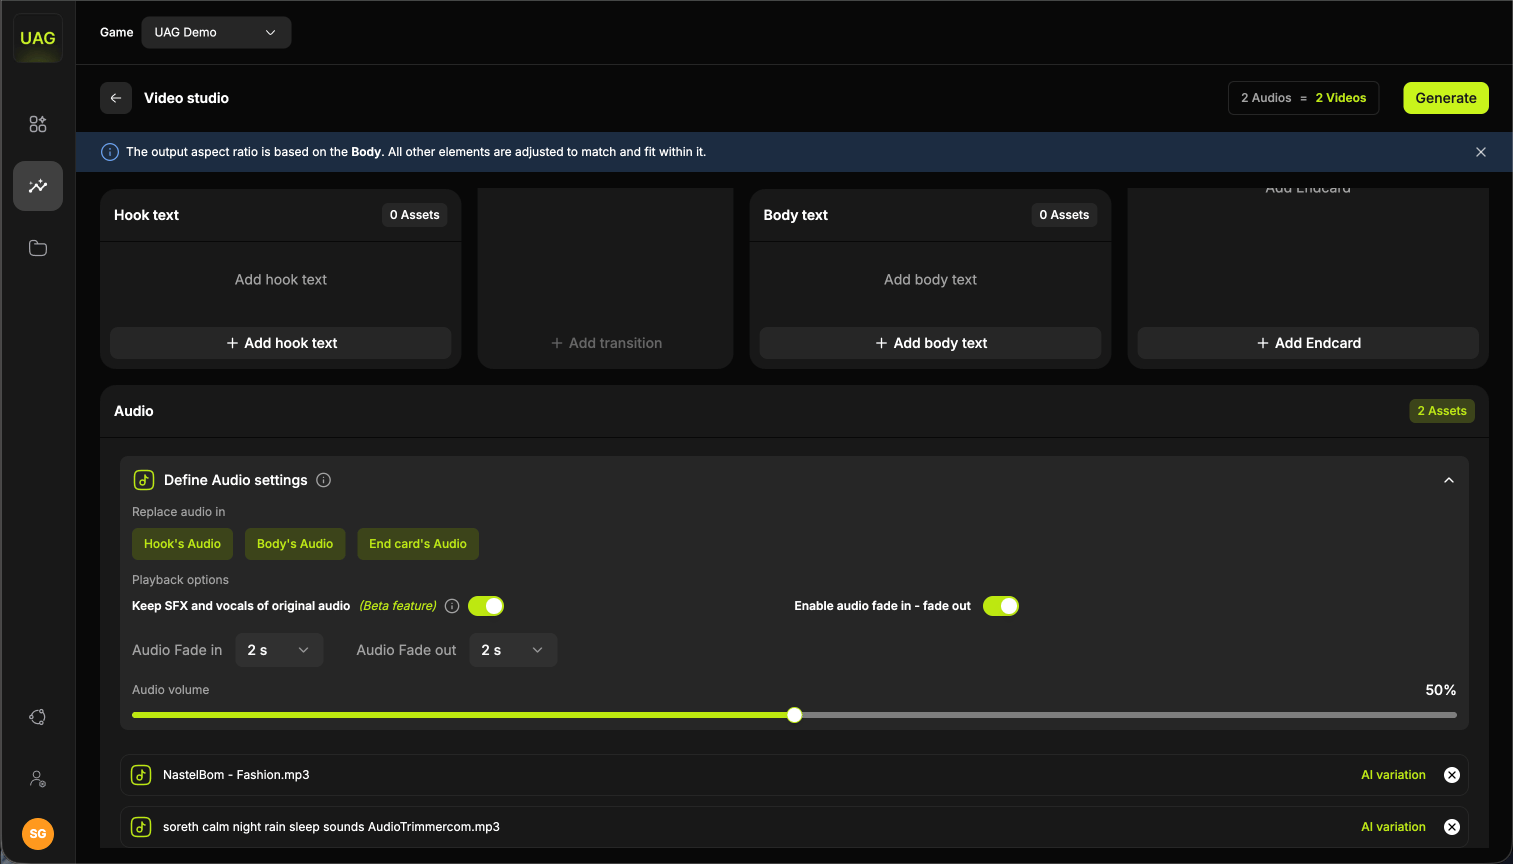
- Replace audio in, choosing where the track plays. By default it runs across the full video, or you can limit it to the hook, the body, the end card, or a combination such as hook and body.
- Keep SFX and vocals of original audio (Beta), which layers your track over the original’s sound effects and voices instead of replacing them. Without it, the original audio is muted.
- Audio fade in and out, for a smooth start and finish rather than a hard cut.
- Volume, a slider for the replacement track’s level.
AI audio variations
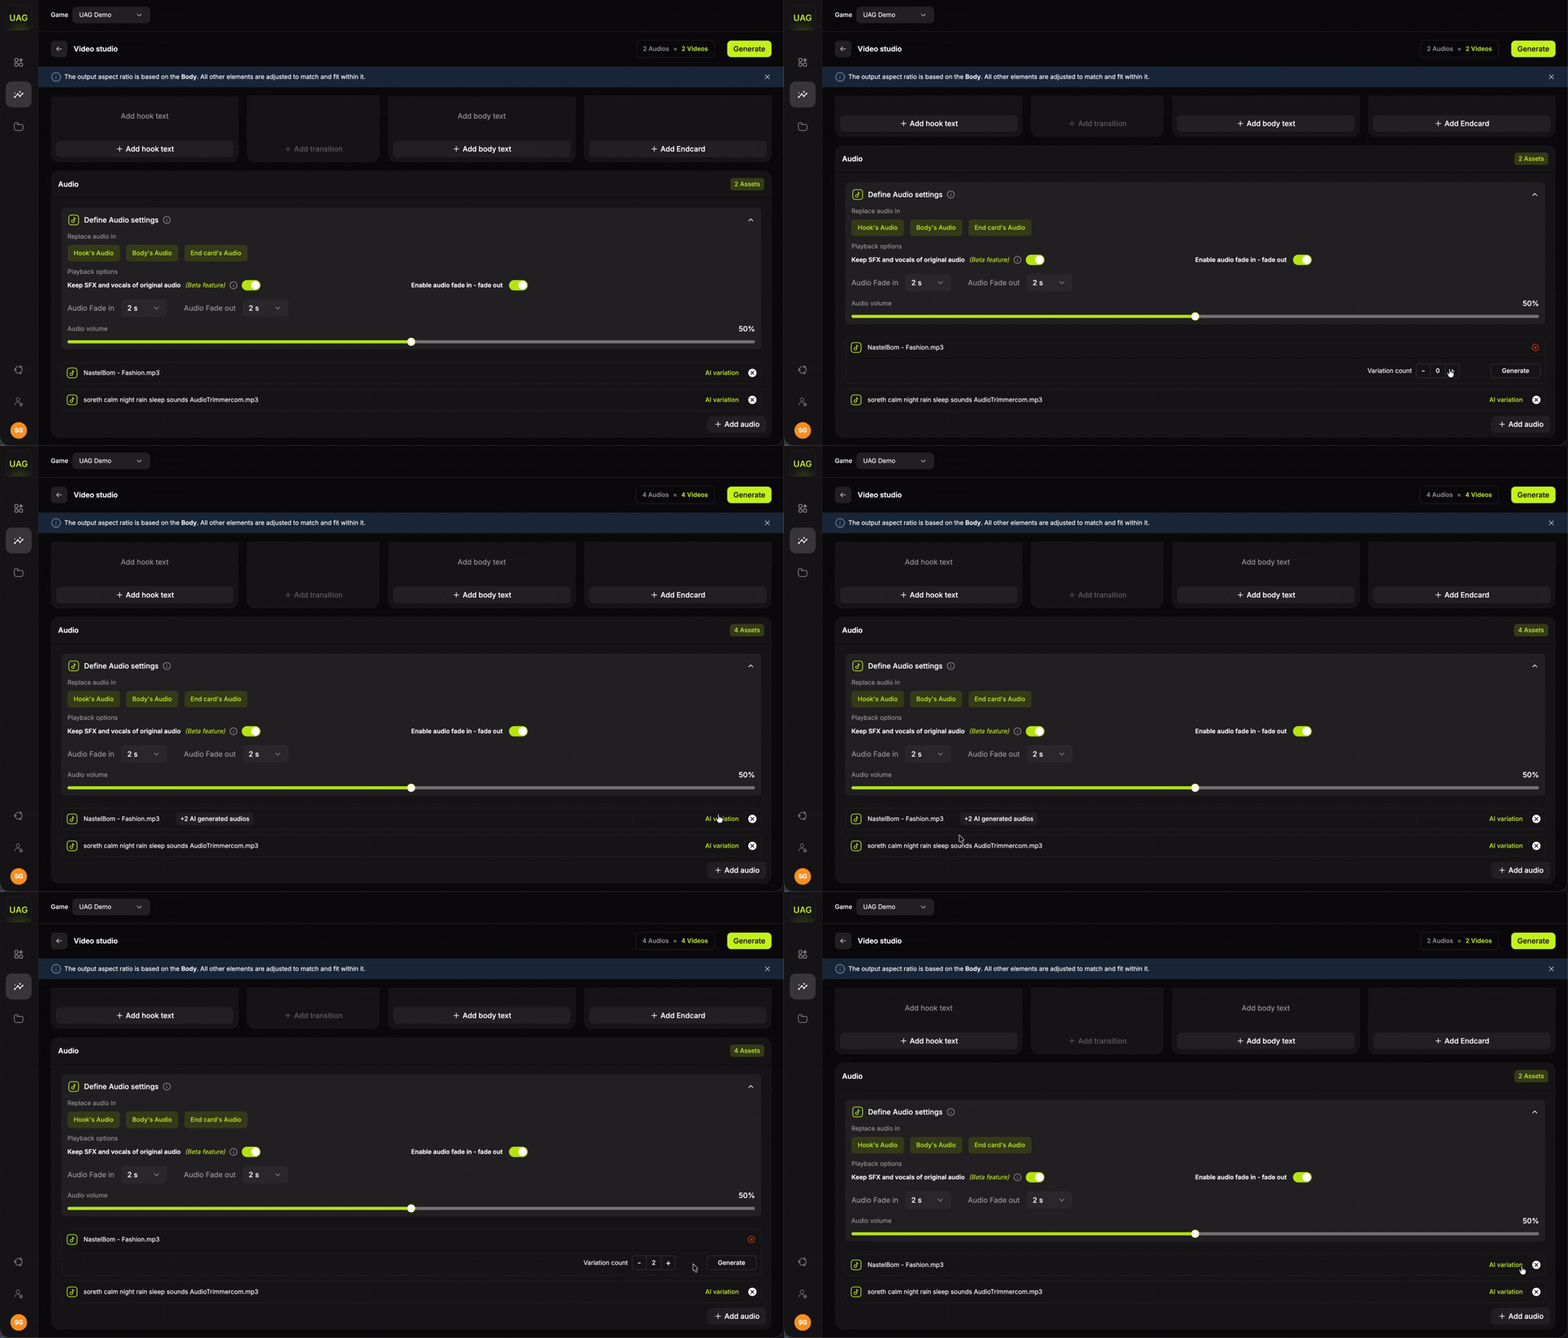
Audio variations work differently from text. There is no preview or approve step, because an audio variation only exists once it is generated, so all of them join the batch automatically. Each one counts toward your 100 variation cap.
Name the project and choose where it saves
Before anything renders, give the project a name and choose the folder in Projects that its variations will save into. You can pick an existing folder or create a new one here. Saving triggers generation, so your batch is queued the moment you are done.Track progress
Progress is shown on the Video Studio home page as a bar moving from 0% to 100%. You do not need to stay on the page while it runs. Several batches can generate at once, so you can start another composition while the first is still rendering and track them all from the same list.Results
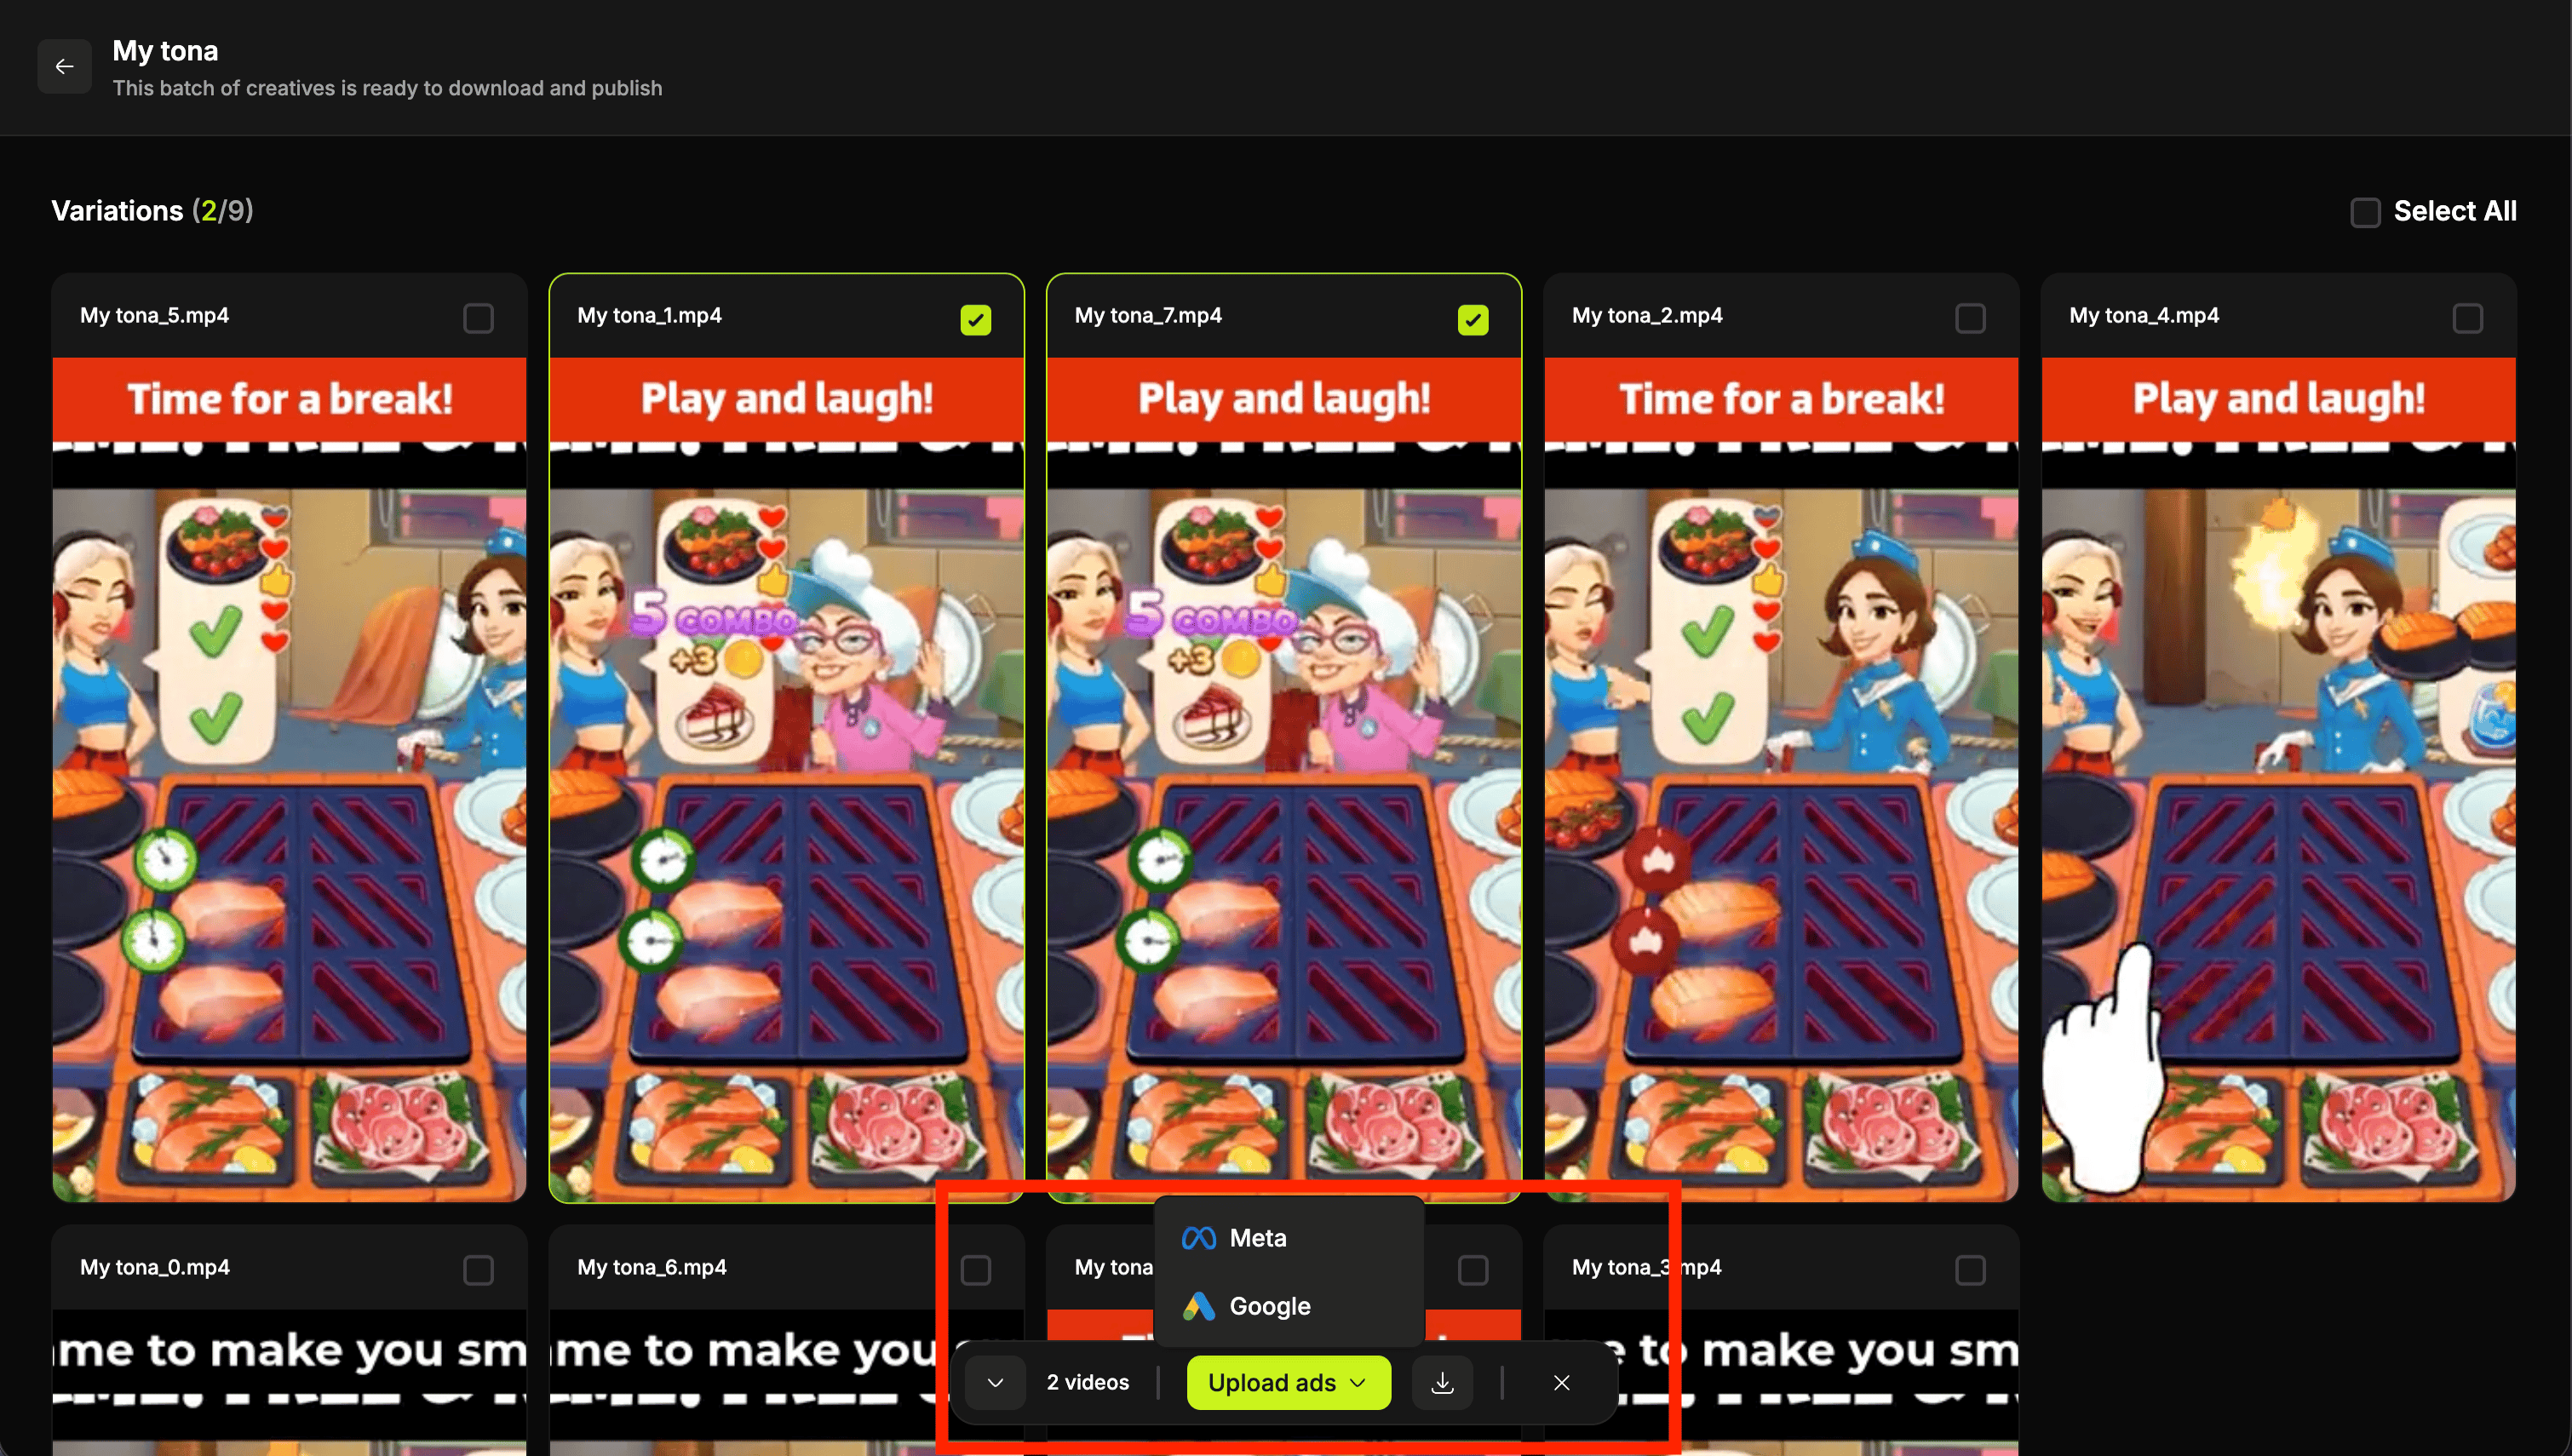
When rendering finishes, the project opens on its results view, headedVariations (n/n).
From here you can:
A worked example
You have three recreated hooks, one delivered body template and a set of hook lines to test.1
Pick the body first
It sets the aspect ratio for everything else, so choose the 9:16 template.
2
Add the three hooks
The header now reads
3 Videos.3
Add one hook text, styled properly
Position it, style it, and check it against all three hooks in the preview carousel.
4
Generate three AI variations of that text
They inherit the styling. The header reads
3 Hooks × 4 Hook Texts = 12 Videos.5
Leave audio and transitions on their defaults
One variable per test. Render the 12, ship them, and you will know which hook and which line won.